Revic Hinged Picatinny Rifle Scope Rings
INSTRUCTION MANUAL
Revic Hinged Picatinny Rifle Scope Rings
The Revic Hinged Picatinny Scope Rings are precision-machined, quick-detach rings engineered for fast, repeatable scope mounting on Picatinny rails. Built from high-strength 7075 T6 aluminum, they provide rock-solid clamping and precise alignment.
What's in the Box
- Pair of Precision Machined Revic Hinged Picatinny Rings
- T20 Screws, Quantity 8
- Product Manual QR Code
Torque Specifications
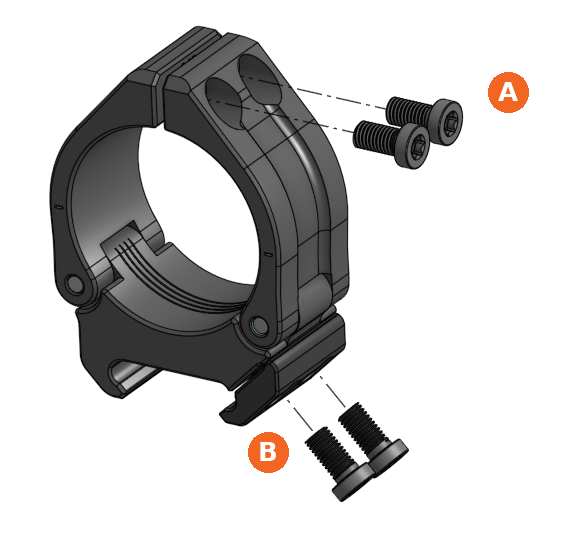
A. Hinged Ring (Top) Screws Torqued to 25 inch lbs.
B. Picatinny Base (Bottom) Screws Torqued to 25 inch lbs.
***Over Torquing any of these screws can lead to damage of the product or your Rifle Scope. Precisely follow torque spec guidelines.
***Over Torquing any of these screws can lead to damage of the product or your Rifle Scope. Precisely follow torque spec guidelines.
Installation & Torque Procedure
Tools: calibrated torque driver with the correct bit for the clamp screws; alcohol-based cleaner or lens wipes.
Final clamp-screw torque: 25 in·lb
- Clean the interface. Before mounting, thoroughly degrease the scope main tube and both ring bores with an alcohol-based cleaner (lens wipes or IPA). Wipe until no oil or residue remains, and allow all surfaces to dry fully. Do not apply oil, grease, anti-seize, or threadlocker to the clamp screws, tube, or bores. Any lubricant lowers the clamp friction and over-stresses the tube at a given torque.
- Position and align. Set the scope in the rings, establish eye relief, level the reticle, and close the ring caps. Hand-start all clamp screws.
- Snug pass. Bring every screw to light contact, finger-tight, then a light snug. Alternate between the two screws on each ring so the ring closes squarely. Confirm the gap between the ring halves looks even side-to-side.
- Step-torque in alternating passes. Advance the screws in stages, alternating between the two screws on each ring at every stage, and bringing both rings up together (complete each pass on both rings before moving to the next):
- Pass 1 — 40%: 10 in·lb, front screw then rear screw, each ring.
- Pass 2 — 70%: 18 in·lb, front screw then rear screw, each ring.
- Pass 3 — 100%: 25 in·lb, front screw then rear screw, each ring.
- Confirmation passes. Re-apply full torque (25 in·lb) to every screw in the same alternating order. Because seating each screw slightly relaxes its neighbor, repeat this pass until no screw advances when the driver reaches torque, normally one or two more passes. The joint is fully seated when every screw holds final torque with no further rotation.
- Final check. Verify the gap is even on both rings and all four screws are at final torque.
- Re-torque after the first 5 shots. After the first five rounds, re-check every clamp screw to final torque. Initial firing beds the fasteners into the aluminum threads; re-torquing takes up that settling and establishes the final, stable preload.
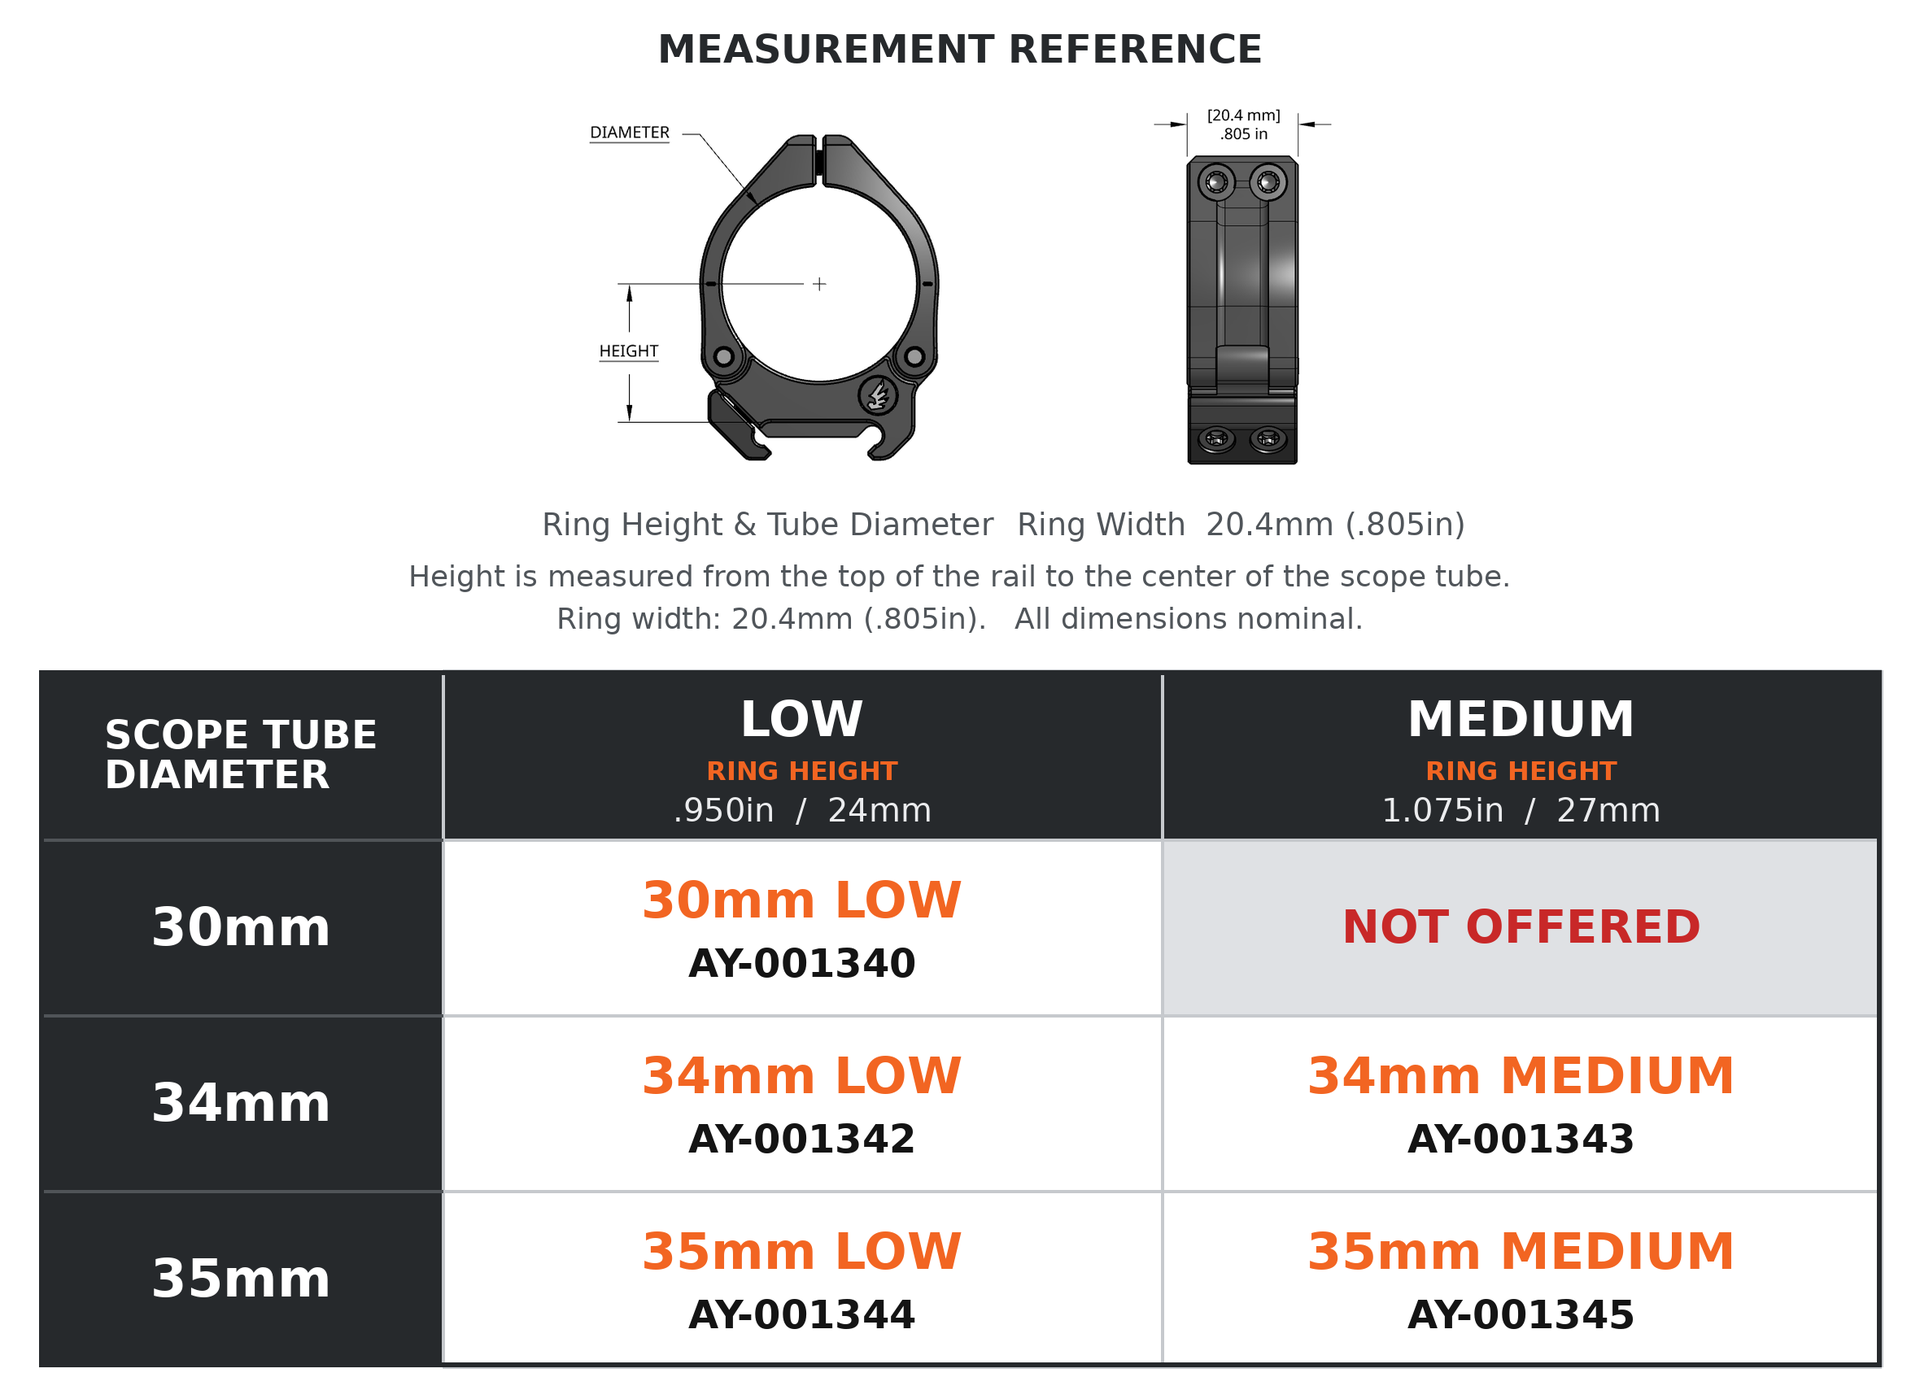
Compatibility & Offerings